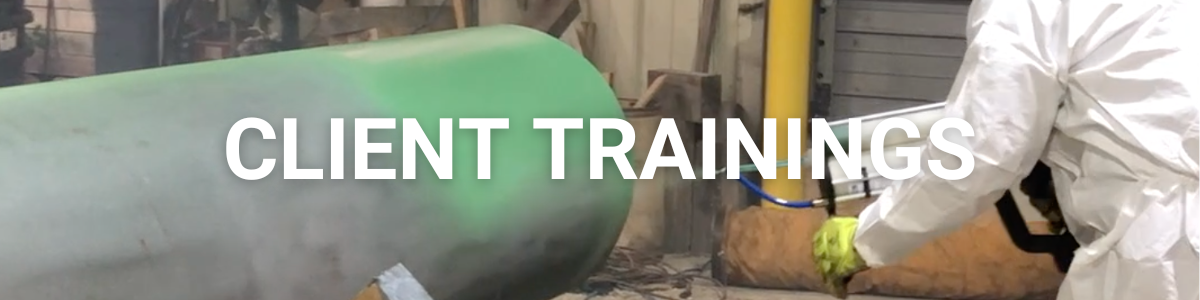
Explore real world case studies showcasing high performance repair and protection solutions
Most recent posts:
Coating Integrity Field Repairs That Last
Who It’s For
This session is useful for:
-
Pipeline Technician
-
Pipeline Operator
-
Pipeline Field Technician
-
Pipeline Construction Laborer
-
Pipeline Welder
-
Pipeline Fitter
-
Pipeline Coating Technician
-
Pipeline Inspector
-
Pipeline Integrity Technician
-
Pipeline Maintenance Technician
-
Pipeline Repair Technician
-
Pipeline Locator
-
Utility Locator
-
Pipeline Surveyor
-
Pipeline Right-of-Way Agent
-
Hydrostatic Testing Technician
-
Pipeline Equipment Operator
-
Water Main Technician
-
Gas Distribution Technician
-
Oilfield Pipeline Technician
Today, we’ll discuss liquid repairs on FBE (Fusion-Bonded Epoxy). Our guest speaker is Steve Hall, a sales representative at 3M.
Let’s get right into it. 3M classifies coating repairs into three categories: holiday repairs, small-area repairs, and large-area repairs. Holiday repairs apply to defects that are 4 millimeters or smaller. I’ll explain each category in more detail on the next slide.
A holiday defect is generally not visible to the naked eye; it’s detected with holiday detection equipment. These repairs are typically performed at the coating plant or in the field during electrical continuity testing. A holiday may be caused by a steel defect, a coating defect, contamination, or another issue.
A small-area repair is defined as a defect smaller than 25 square inches. These are usually visible and may result from handling, transportation, or backfilling damage, or from an area an inspector has identified as out of specification and requiring repair.
A large-area defect is bigger than 25 square inches. I’ll explain shortly why small- and large-area repairs are treated differently.
Let’s start with holiday repairs, shown in the upper-left corner, alongside examples of a small-area repair and a large-area repair. I also want to talk about using a template for holiday repairs. In our training, we typically use a template to mask the repair area and guide the abrasion process.
The upper-right image shows an example. We use an 8-mil film on a release liner, placed around the holiday with the defect centered in the middle. I once visited Tenaris in Canada and saw the team using a template. I considered it a best practice because I watched 80 people complete repairs, and every repair looked consistent. You often see poor-quality repairs in the field, so having a template can help improve consistency.
Here are the typical steps for a holiday repair:
- First, clean the area with solvent if needed. If the holiday has just been identified on a clean pipe at the coating plant, solvent cleaning may not be necessary. But if the pipe is dirty in the field, clean it with solvent. Grinding the defect area is optional. If a steel burr caused the holiday, use a grinder to smooth it out. Be careful not to gouge or otherwise damage the steel.
- Next, place the template over the cleaned area—or tape off the area if you’re not using a template. At a coating plant, where repairs are often done as free repairs, a template or tape may not be used. In the field, I recommend using some type of masking procedure or template.
- Then abrade the surface with 80- to 120-grit sandpaper. The goal is to scratch the surface and create a profile, not to gouge deeply into the FBE. You’re aiming to remove about 1 to 2 mils of material. Don’t just lightly touch the surface with the sandpaper; make sure the area is fully abraded.
- Finally, wipe the abraded surface with a clean, dry cloth. Wipe in one direction so you don’t smear removed material back onto the repair area. Fold the cloth to expose a clean section, wipe again, and repeat a third time. This leaves a clean surface ready for repair.
Next, apply the liquid epoxy coating at a minimum thickness of 25 mils. If the existing coating is 50 or 60 mils thick, apply enough material to match it. Heating is optional. It may be used to speed curing so the repair can be handled sooner. If you heat the pipe before applying the coating, this is typically done with a gas torch. After applying the coating, however, use a commercial heat gun if additional heat is needed.
Remove the template while the coating is still wet, then allow the repair to cure. Cure time depends heavily on temperature. It may take anywhere from about two to 24 hours; four to six hours is common. Once cured, holiday-test the repair and document it.
If the specification allows, a one-part patch-stick product can be used as an alternative for a holiday repair. Follow the product’s application procedure. I prefer two-part systems because they generally provide better adhesion, but some crews use one-part patch sticks.
Small-area repairs
A small-area repair is less than 25 square inches—for example, an area measuring 5 by 5 inches. A template usually isn’t needed, but masking the repair with tape is good practice.
For a field repair, clean the area with a solvent such as acetone. MEK is also suitable, though I typically use acetone because it is less aggressive. Grinding is optional, since small-area repairs don’t usually involve a steel defect.
Mask the repair area as needed, then abrade the surface with 80- to 120-grit sandpaper. You can also use a suitable mechanical tool to roughen the surface. Wipe the abraded area with a clean, dry cloth, as described earlier, then apply the coating and remove the tape.
If needed, use a commercial heat gun to speed curing before the pipe is placed in the ground or covered in the right-of-way. Test the repair before burial, and document the work when required—especially for field repairs.
One note about the order of masking and abrasion: some inspectors want to see abrasion marks outside the masked area. In that case, abrade first, then apply the tape. Other inspectors don’t want abrasion marks beyond the repair boundary. For those repairs, apply the tape first and abrade only inside the masked area.
If you’re using the template shown in the previous example, you’ll abrade inside the template rather than outside it. Inspectors may have different preferences, so follow your company’s procedures and the requirements of the inspectors you work with. My preference is to abrade inside the taped-off area, but some may require the opposite.
Large-area repairs
A large-area repair is anything greater than 25 square inches. For these repairs, we recommend brush blasting rather than sanding. Other companies may use a different threshold for switching to brush blasting; 25 square inches is our typical recommendation.
Start by solvent-cleaning the area. Grinding is optional, but if there’s a steel defect that needs attention, grind it before preparing the surface. Then brush blast the area using steel grit. Clean it with dry, clean air or a lint-free cloth.
Masking is still a good practice, especially for larger repairs. A neat, rectangular repair is generally preferable to an irregular, unevenly shaped one. Apply the coating, and use heat if needed to speed curing. If you’ve used tape, remove it while the coating is still wet. Once the repair has cured, holiday-test the area.
Those are the three repair methods. Before we open it up for questions, I’d like to briefly cover recoating windows.
When repairing a liquid coating, make sure you understand its recoat window. If the coating is still tacky, you can generally recoat over it. For FBE, the surface will need to be abraded before applying another coat. The same applies to liquid coatings once they’re no longer tacky. Follow the appropriate small-area or large-area repair procedure for preparing the surface.
If you’re unsure whether a liquid coating is still tacky, it’s best to abrade the area before recoating.
The 3M products I recommend for the liquid-coating repairs we discussed—including holiday, small-area, and large-area repairs—are 323+ and 328.
Whenever you’re applying a liquid coating, use a repair documentation form and record the work. Document the surface profile, measured with replica tape or a profilometer, as well as the wet- and dry-film thicknesses. You’ll need that information before you can sign off on the repair.
I’m often asked how to tell whether a liquid-coating repair is ready for handling, burial, or final acceptance. The best way to verify that is with a Shore hardness test using a durometer. Many coating products are around 80 hardness, plus or minus three to five points. A reading in the range of 75 to 85 generally indicates that the pipe may be ready to handle.
Also document the holiday-test results and environmental conditions on your quality-control form.
Contractor training is important, especially for crews working in the field. Inspectors may require contractors to show proof that they’ve been trained on the products and application methods they’re using. Training should cover safety and the relevant procedures—whether the crew is performing repairs, roller application, high-cell spray, plural-component application, or other work. Make sure contractors are trained for their assigned tasks and that the training is documented.
QUESTION:
I run into this question when I compare the TDSs: Is the main difference between 328 and 323+ their cured hardness? I understand 323+ is better suited for ARO applications and may offer greater abrasion resistance—is that right?
ANSWER: The 328 is designed for ARO applications and offers greater abrasion resistance. I consider 323+ our standard epoxy, while 328 is our premium epoxy. It can be applied directly to steel and provides better adhesion and flexibility than 323+. It’s also well suited for use as a liquid ARO over FBE.
QUESTION:
How does the repair perform compared with that factory FBE coding?
ANSWER: There are several ways to assess the quality of a repair. For example, you could perform an ASTM D4541 pull-off adhesion test. In my view, a good repair should show strong adhesion—potentially withstanding a few thousand psi.
That’s one reason I like the template method and circular repairs: they tend to produce consistently good adhesion. You can also make sample repairs alongside the job and evaluate them by carefully probing the edges with a knife. During a training session in Austin this week, we used that approach to check that the repair edges were well bonded.
When removing the tape or template, it’s important to let the coating flow out at the edges so there’s no sharp, raised edge. That matters especially when the pipe will be buried or used in directional drilling, where rough edges could catch or lift. The repair should blend smoothly into the surrounding coating, with edges that resist being lifted by a knife.
QUESTION:
How does the repair perform compared with the original factory FBE?
ANSWER: Original FBE can easily exceed 3,000 psi in a pull-off adhesion test. We’ve seen FBE bonded to steel reach 10,000 to 12,000 psi. A repair won’t typically achieve that level, but you want it to reach a few thousand psi and demonstrate strong adhesion.
QUESTION:
Can 323+ be used to coat a 30-foot tank, and is it NSF-approved?
ANSWER: Our liquid coatings are no longer NSF-listed, although some other liquid coatings are. In 2018, 3M delisted its liquid coatings. My understanding is that NSF evaluates residuals in parts per million, and the results for two-part liquid epoxies can differ from those for FBE coatings. While our coatings may still fall within the permitted limits, 3M chose to delist them out of an abundance of caution.
I don’t want to overstate the exact reason without confirming the details, but I wish we could still use our liquid coatings in NSF applications.
If you have any more questions, we’ll be sending out a survey to everyone who attended to ensure we’re providing maximum value with these discussions. You can also reach out to us at 248-735-7000 or via email at office@usigroups.com.
Rapid Concrete Repairs that keep you running
Who It’s For
This session is useful for:
Plant Manager
Facilities Manager
Maintenance Manager
Maintenance Supervisor
Reliability Manager
Engineering Manager
Plant Engineer
Project Manager
Capital Projects Manager
Construction Manager
Operations Manager
Operations Director
Director of Facilities
Director of Maintenance
Industrial Facilities Manager
Manufacturing Manager
Production Manager
EHS Manager
Safety Manager
Warehouse Manager
Today, we’ll discuss rapid concrete repairs that help keep your operations running. Our guest speaker is Doug Klingensmith, Vice President of Sales and Marketing at Unconventional Solutions. In his day-to-day role, Doug works directly with clients to solve complex issues involving corrosion, erosion, abrasion, chemical attack, and metal repairs. He is passionate about helping customers repair equipment instead of replacing it, avoid unplanned downtime, and return to service as quickly as possible.
Thank you for the kind introduction, Chris.
Having worked in this industry since 1995, I was once told by a wise contractor that there are only two types of concrete: concrete that has cracked and concrete that’s going to crack. Concrete simply doesn’t hold up well against rock salt and de-icing chemicals.
Today, we’ll discuss concrete repairs and the cost of downtime. Traditional concrete typically becomes firm within 4–12 hours, can withstand rain after 24 hours, and is ready for foot traffic within 3–7 days. However, standing water can wash out the surface, so puddling must be avoided.
Concrete requires approximately 28 days to reach its full design strength and stop releasing moisture. Protective coatings should not be applied until the concrete has cured for roughly 28–30 days. Applying a coating too early can trap moisture and cause it to peel.
At Unconventional Solutions, we use non-cementitious repair materials for damaged concrete, particularly in chemical containment areas and heavy industrial flooring applications. For example, our 570 XF patch repair is ready for foot traffic in just two hours and can handle heavy loads within four to five hours. It can also receive a chemical-resistant lining immediately after installation.
Some of you have asked about DuraMar MagCrete. Traditional concrete typically reaches compressive strengths of 2,800–4,000 PSI, while DuraMar MagCrete can reach 5,000 PSI in just one hour under normal temperatures.
Here’s a great example of when a non-cementitious epoxy repair compound makes more sense than traditional concrete. These steps at one of our military academies were in very poor condition, and graduation was only 28–30 days away. Removing the existing concrete with a jackhammer and repouring it would have been nearly impossible.
The contractor used Resimac 576XF and Resimac 71LW, but then lost 15 days of work due to rain. That left only 15 days or less to complete the project. As you can see, the finished repair turned out beautifully. A UV-stable epoxy coating was then applied to blend the repair into the surrounding surface, and the steps were ready in time for graduation.
We typically recommend four or five products for concrete patching that can restore service in hours instead of days. The 570XF comes in convenient small kits and reaches a compressive strength of 12,000 PSI—three to four times stronger than most traditional concrete.
During a dolly pull adhesion test, the surrounding concrete fails before the epoxy bond does. Unlike some products available at hardware stores that may last only one or two seasons, these epoxy systems are designed for long-term performance, including freeze-thaw conditions.
The 576 Quartz Screed and 577 Chem Screed are especially durable because we first apply a penetrating tack primer that creates a tenacious bond with the concrete. Within 48 hours, the 576 Quartz Screed, 577 Chem Screed, and DuraMar MagCrete can reach approximately 12,500 PSI in compressive strength.
DuraMar MagCrete is also ideal for cold-weather applications, including temperatures below freezing—down to -15°F. For steel mill environments, where molten steel may reach concrete temperatures of 1,000–1,500°F, DuraMar MagCrete can withstand temperatures up to 2,000°F.
Here’s another example from a Marathon loading facility near Catlettsburg Refinery. Because shutting down the loading and unloading docks for weeks wasn’t an option, repairs were completed over the weekend—starting around 3 p.m. Friday and finishing by 4 p.m. Sunday—so the facility could be back in service Monday morning. A chemical-resistant coating was then applied over the repair.
For comparison, standard concrete typically has a compressive strength of 3,000–4,000 PSI, while some high-strength products may reach 5,000–6,000 PSI. Our materials offer significantly higher performance:
- 571 Lightweight: Can be troweled vertically up to 2–3 inches thick without forms.
- DuraMar MagCrete: Up to 11,500 PSI.
- 570XF: Up to 12,000 PSI.
- 576 Quartz Screed: Up to 12,500 PSI.
- 577 Chem Screed: Similar strength to the 576, with the added benefit of being a novolac epoxy repair mortar.
The 577 Chem Screed provides excellent chemical resistance, withstanding hydrochloric acid concentrations of approximately 34–36% and sulfuric acid spills ranging from 93% to as high as 98%. It’s an ideal choice for repairs exposed to aggressive chemicals.
The 571 Lightweight is especially useful for applications like transformer stations, where concrete supports may have extensive damage and large sections of concrete are missing.
Remove all loose and deteriorated concrete before beginning the repair. The 571’s adhesive strength is greater than that of the surrounding concrete, so the weak concrete must be eliminated first.
In this example, the finished repair looks excellent. The team used our white 550 roofing membrane for waterproofing, though the white 555 can also be used for waterproofing repaired areas.
It’s important to remember that we offer multiple concrete repair solutions—not just one product. Chris has highlighted our five primary materials:
- 570XF: Best for smaller repairs, such as trip hazards, slips, and falls. These incidents are among OSHA’s most commonly reported workplace injuries and can cost companies approximately $22,000–$23,000 per incident.
- 571LW: Designed for lightweight repairs on vertical, overhead, and suspended surfaces.
- 576 Quartz Screed: Our workhorse for large areas of damaged concrete. It can be screeded over existing concrete and is used with our 503 tack primer. The 503 can also help dustproof newer concrete.
- 505 Damp: A damp-bonding concrete dustproofing material and primer for wet concrete surfaces.
- 577 Chem Screed: Designed for areas exposed to aggressive acids and caustic chemicals. The 576 can also be used in these environments, but it requires an additional chemical-resistant coating. The 577 provides chemical resistance in a single application, helping facilities return to service faster.
- DuraMar MagCrete: Developed to meet specific performance requirements, including application in temperatures as low as -15°F and resistance to temperatures up to 2,000°F.
Here’s another example from a wastewater treatment plant in Kalamazoo, completed around 2001 or 2002. According to the maintenance manager, the finished repair has performed extremely well.
We also repaired steps at one of our first warehouses in 2005, and as of 2026, they still have no cracks. These materials are designed for long-term repairs—not temporary fixes.
The 576 can also be used for grouting and aisle repairs, with overnight forklift traffic typically allowed after about 24 hours. The 577 is the ideal choice for acid-resistant applications, while DuraMar MagCrete offers additional versatility for demanding environments.
Expansion joints should be properly chipped and prepared before the next shift. However, 570XF should not be used to fill expansion joints; it is designed for quickly repairing damaged concrete.
One of our early projects was completed at Fermi Nuclear Power Plant, where the cooling tower walls were in extremely poor condition. The facility purchased approximately $40,000 worth of 571 Lightweight material for the repairs and was extremely satisfied with the results.
These products provide a faster way to restore damaged concrete and return areas to service. Traditional concrete reaches only about 40% of its strength after three days and approximately 70% after seven to eight days. By comparison, these repair materials can often be ready for full use in hours or days—not weeks.
QUESTIONS:
Q: What is the biggest mistake an applicator can make when a plant needs an area back in service the same day—one that could prevent them from achieving the promised rapid return-to-service time?
A: The biggest mistake is failing to properly remove the damaged concrete. Applicators should use a hammer to identify hollow areas and chip out anything that sounds loose or compromised. Even if the surface looks sound, hollow concrete often indicates deterioration underneath.A second common mistake is underestimating the amount of material needed or using the wrong application tools. Proper surface preparation, accurate material calculations, and the right equipment are essential for achieving fast return-to-service times.
Q: When evaluating a concrete repair, what key factors help determine whether to repair the existing concrete or remove and replace it entirely?
A: In most cases, I recommend repairing the existing concrete rather than removing and replacing it. Full replacement only makes sense when speed isn’t a priority and the facility can afford to lose a loading dock or manufacturing area for several weeks.
For exterior concrete, replacement may also face the same long-term damage from de-icing chemicals used during winter. When minimizing downtime matters, a properly prepared repair is usually the better solution.
Q. Are these products UV-stable on their own, or do they require a protective topcoat?
A. I wouldn’t describe these products as fully UV-stable, but they do offer good UV resistance. For example, the repair we completed at our former warehouse in Milford, Michigan, showed no discoloration. The primer may yellow over time when used alone, but that doesn’t necessarily mean it’s breaking down.
According to AMP, epoxies may lose approximately 0.5 to 1 mil per year from UV exposure. However, because these products are applied at a much greater thickness, UV exposure typically has little practical impact.
If you have any more questions, we’ll be sending out a survey to everyone who attended to ensure we’re providing maximum value with these discussions. You can also reach out to us at 248-735-7000 or via email at office@usigroups.com.
Peat Sorb – Sustainable Maintenance: Green without Compromise
Who It’s For
This session is useful for:
Facilities Manager
Environmental Consultant
Sustainability Officer
Operations Manager
Property Manager
Maintenance Supervisors
Building Engineers
Project Manager (Construction/Renovation)
Building Engineer
Product Manager (Eco-Friendly Products)
Heath and Safety Officer
Corporate Social Responsibility (CSR) Manager
Waste Management
Hazardous Waste Management
Today, we’re excited to have Lynn Hurdman from Peat Sorb Corporation with us. She’ll be sharing her expertise on their Peat Sorb absorbent. Lynn has extensive experience in the industry and is one of the most knowledgeable people I know in the absorbents market. We’ll wrap up with a Q&A session at the end, so thank you for joining us!
Welcome to our Peat Sorb seminar! I have a brief amount of time to share some important highlights about the absorbent industry and the sectors we’re involved in, including oil and gas, government, and heavy industry.
It’s essential to understand that Peat Sorb is different from the absorbents you might be familiar with, like Oil-Dri and Oil Gator. Unlike those, Peat Sorb has no chemical reactivity with any substances and effectively absorbs all hydrocarbons. We have lab tests showing non-detect levels for mercury, arsenic, and various petroleum categories, including alcohols, ethers, and acids. Plus, it’s landfill-friendly and doesn’t leach.
We’ve also introduced a new blend that can absorb contaminated water and solidify it with hydrocarbons. The original blend focuses on separating hydrocarbons to provide clean water. This gives us two pathways to achieve economical and environmentally friendly results that protect our ecosystems.
Peat Sorb is shipped globally, and I’d like to briefly highlight its use in Nigeria, where soil toxicity and chemical variety are significant issues. In accredited lab tests, we identified a total petroleum count of over 31,000. After just one day of using Peat Sorb, that number dropped to 23,000, and by day 14, it was down to 1,700. While we didn’t continue testing beyond that, it’s clear we could have reached non-detect levels.
In Brazil, we helped Peat Sorb clean up 2 million liters of crude oil from the ocean, showcasing the significant impact we can have on both soil and water. These are just a few examples of what Peat Sorb can achieve.
No other absorbent can truly meet everyone’s needs, but so far, we have been successful in doing just that. For instance, BP, which operates the fifth-largest refinery in the U.S., contacted me on a Sunday about a significant spill—over an acre and six inches deep, primarily involving hydrogen sulfide and benzene. We were already prepared for spill response with our inventory and shipped our product to the site. It was effective, but then the situation changed when she called me back to say that melting snow and ice were complicating matters. Thankfully, we had our new blend, designed for absorbing both water and hydrocarbons. She expressed how invaluable our product was in that situation and is willing to speak to anyone in the oil and gas sector about how we set best practices and save the day.
In addition to oil and gas, there’s been a recent executive order in the U.S. mandating that federal agencies and contractors make specific purchasing decisions. This means Peat Sorb has become a required option under both President Biden and the previous administration. This recognition is significant, especially as it falls under the bio-based, bio-preferred program. Among all tested absorbents, we were the only one to receive USDA certification for having a net zero carbon footprint.
For those of you involved in heavy metals, I have a distributor in Peru who is contracted with local mines to provide Peat Sorb for all their mining needs.
Due to the ongoing war, there’s been significant talk about a global fertilizer shortage. Peat Sorb offers a solution, as it can be repurposed into a fertilizer. After absorbing heavy metals, oil, gas, or any other liquid, the peat breaks down and neutralizes the toxicity, resulting in nondetect levels of harmful substances. Additionally, peat is rich in essential minerals like calcium, iron, manganese, and phosphorus. This allows us to deliver a nutrient-enriched additive to the soil, enhancing its quality and boosting crop yields. So, remember, when using Peat Sorb, don’t just dispose of it in a landfill—consider repurposing it for its added value.
QUESTION 1:
How do people typically dispose of Peat Sorb after, you know, after they’ve used it to absorb hydrocarbons?
Lynn Hurdman: First and foremost, we encourage the reuse of peat, as it may retain additional performance attributes and wicking capacity, making it not just a one-time use product. After it becomes saturated with hydrocarbons, it can be safely incinerated, and we have lab tests to support this. While it is also safe for landfill disposal since it won’t leach, local regulations might require you to follow hazardous waste guidelines, even though it is perfectly safe for landfills.
Christopher Williams: Understood. You mentioned incineration earlier. What kind of energy recovery can be achieved from the hydrocarbons during incineration?
Lynn Hurdman: Great question! According to our lab tests, one pound of encapsulated oil in Peat Sorb can generate 15,500 BTUs. So, yes, it can indeed be repurposed as a fuel alternative.
QUESTION 2:
For someone who is currently using clay-based absorbance or traditional oil dry, what are the biggest differences they would notice when switching to Peat Sorb?
Lynn Hurdman: I’m not quite following. Was there a spill where someone used Peat Sorb?
Christopher Williams: Yes, there was a spill, and it wasn’t the first one at that location. After using Peat Sorb, he noticed that it actually pulled the stain out of the concrete, which was due to oil contamination.
Lynn Hurdman: Right. That’s exactly what you should expect to see. Peat Sorb has wicking properties, allowing it to draw contaminants into its cellular structure. Additionally, peat serves as a foundational element for fossil fuels, which is why it seeks to reconnect with related substances and incorporates them into its structure.
QUESTION 3:
Can Peat Sorb absorb and break down polymer at wastewater treatment plants?
Lynn Hurdman: Yes, Peat Sorb can absorb polymers. It has been used in pulp and paper mills before, as polymers can be quite hazardous—similar to a banana peel in terms of risk. So, Peat Sorb effectively absorbs the polymer and helps break it down.
QUESTION 4:
Can Peat Sorb extract oil from concrete? As we’ve already mentioned, it has a tendency to pull contaminants out. A follow-up question might be about the timeline: if, for instance, the stain is five years old, could it still potentially remove it?
Lynn Hurdman: Yes, that’s the direction I was heading. Essentially, you need to re-liquefy and reactivate the oil since it’s trapped in the concrete. We use brake cleaning fluid, which seems effective in rejuvenating it. Then, you apply the Peat Sorb and agitate it with a stiff broom, allowing you to extract the oil from the pores again.
Christopher Williams: That’s really fascinating to me—being able to pull out a stain that’s been there for years. I might have to try that in my garage. We have another question: how much Peat Sorb is needed for a gallon of oil spill? What’s the one-to-one comparison?
Lynn Hurdman: Typically, we recommend a one-to-one ratio. However, viscosity does play a role. When we say one-to-one, it’s based on the viscosity of the oil being similar to SAE 30 motor oil. If the oil is thicker, you may need to adjust that to a two-to-one ratio. But we start with one-to-one based on SAE 30 motor oil viscosity.
QUESTION 5:
How heavy is Peat Sorb prior to being used and how heavy is it after cleaning the spill?
Lynn Hurdman: Our absorbent is incredibly lightweight. You can think of it like tobacco—it’s extremely light and consists of fine particulates. Even after absorbing hydrocarbons, it remains lighter compared to oil dry, which is made from heavy clay and tends to get heavier. So, we’re only slightly heavier due to the weight of the absorbed hydrocarbons.
QUESTION 6:
As a contractor who has experienced cleaning up spills, are you aware of any pipeline companies that will not allow the use of Peat Sorb?
Actually, Kinder Morgan is looking to purchase Peat Sorb in Texas, not BP. In fact, there isn’t anyone who wouldn’t want to buy it because it addresses the problem quickly, efficiently, economically, and in an environmentally friendly way.
If you have any more questions, we’ll be sending out a survey to everyone who attended to ensure we’re providing maximum value with these discussions. You can also reach out to us at 248-735-7000 or via email at office@usigroups.com.