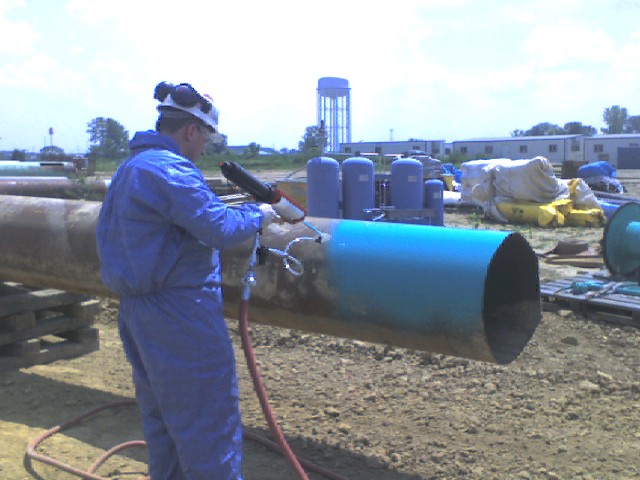
Surface Preparation
Prepare the surface by removing all loose scale, rust or any other foreign matter in accordance with SSPC SP-10 “Abrasive Blasting”. Refer to the Protal Application Specification Guide for additional information. All personnel should be trained by a specialist prior to application.
Attach Air Supply
Attach the air supply hose to the air gun. Minimum 14 CFM air compressor is required. The air supply pressure should by 90-110 psi. The air must be well conditioned to remove moisture from the air stream.
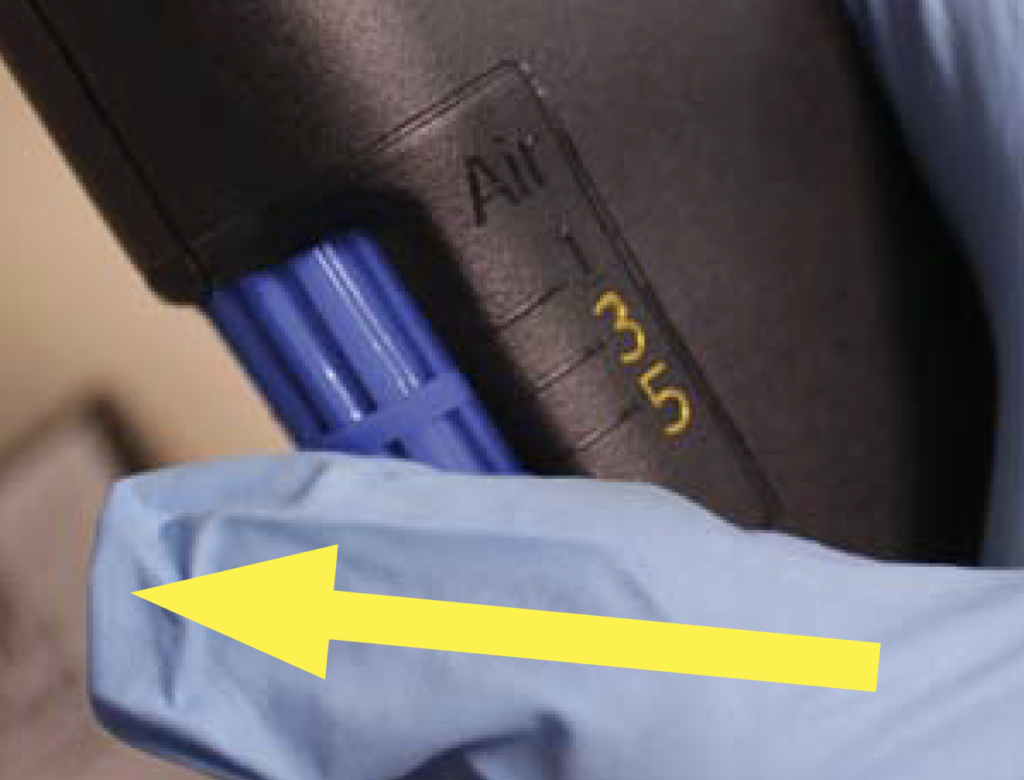
Regulate Air Pressure
Adjust the atomizing air pressure dial. This may bary depending on the product temperature. Yellow markings are to highlight specific areas and do not appear on the actual gun. When spraying with a right angle tip, it may require an increase in air pressure.
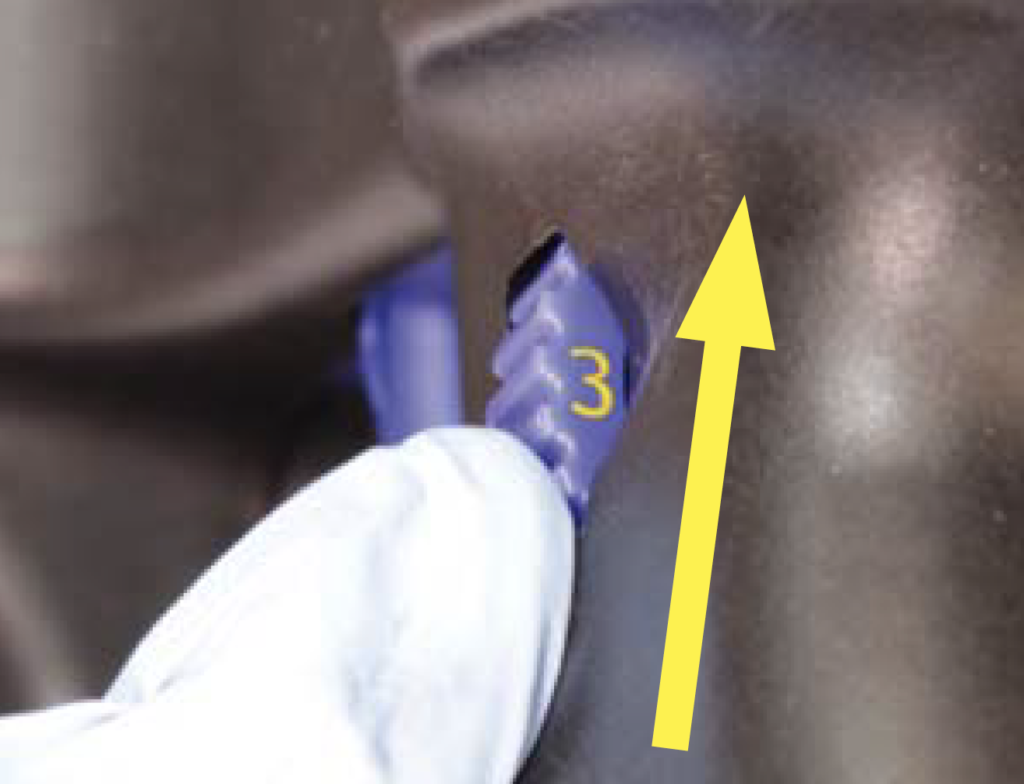
Adjust Fluid Pressure
Adjust the fluid pressure dial by scrolling up on the side wheel shaped dial, near the trigger. This may vary depending on the product temperature. yellow markings are to highlight specific areas and do not appear on the actual gun.
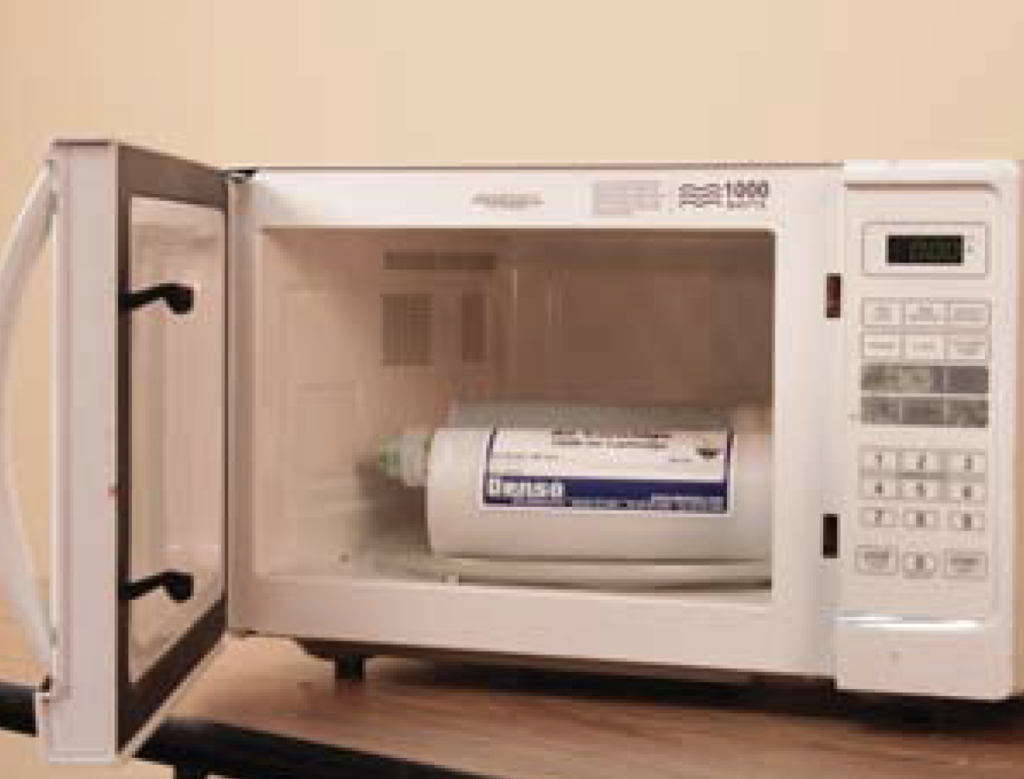
Heat Cartridge
Using a 1000 watt microwave with a turntable, heat the cartridge to 120 degrees F to 130 degrees F. Flip cartridge half way through the heating process to maintain an even temperature throughout the cartridge. Verify temperature with an infrared temp-gun by checking the Part A at multiple locations. 1 minute will heat the cartridge approximately 20 degrees F.
Shake Cartridge
Cartridge shall be shaken by one of the two following method:
Preferred Method-Clamp cartridge in paint shaker, with end cap up, and shake for approximately 30 seconds.
Alternate Method-By hand, shake cartridge well, with the end cap facing up, for approximately 30 seconds. After shaking the cartridge, recheck the temperature of the “Part A: to verify it has reached 130 degrees F to 140 degrees F.
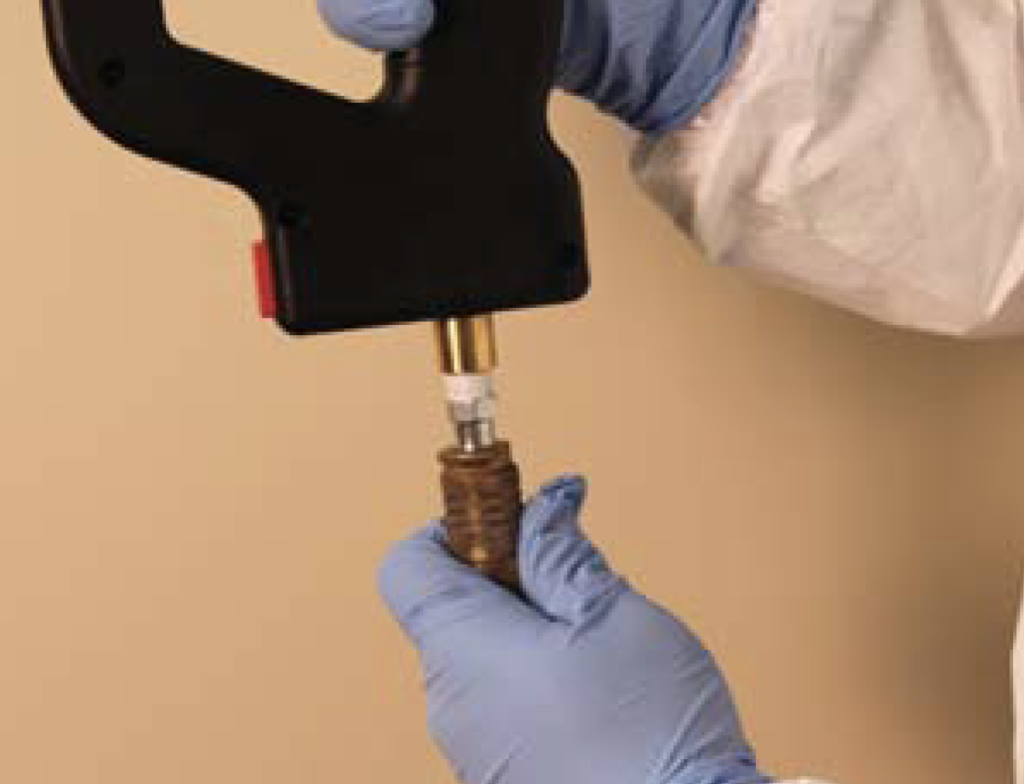
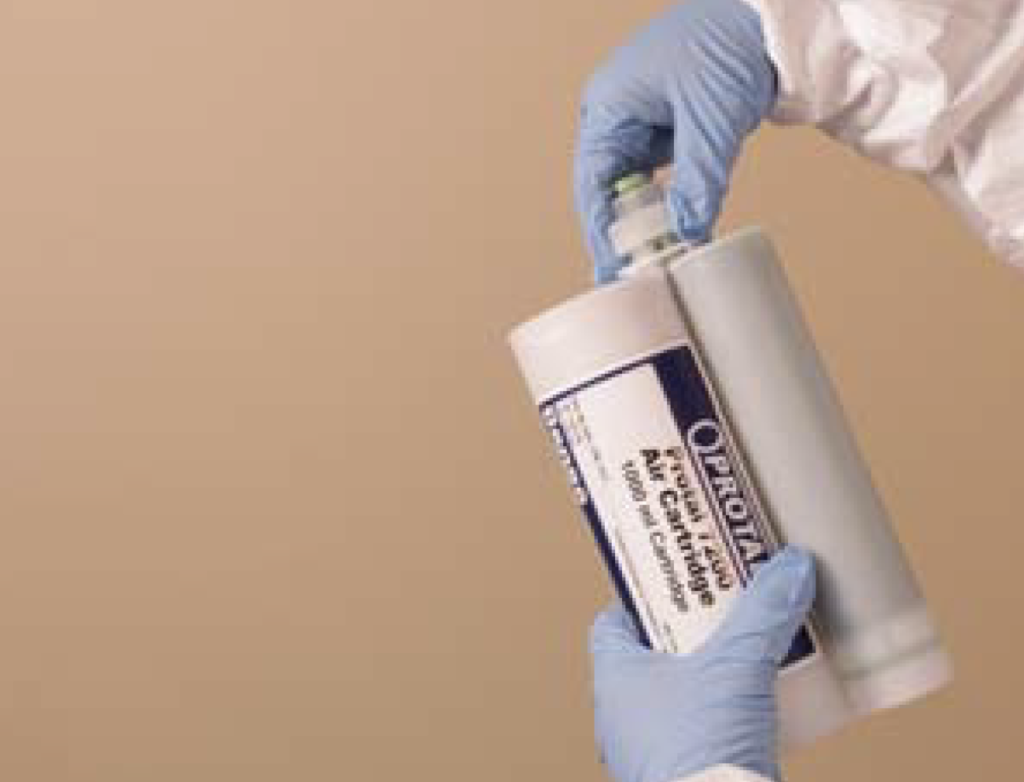
Attach Mixing Tip
Remove cartridge end cap by unscrewing and pulling up. Push the static mixing tip over the cartridge outlet, ensuring the 2 legs are properly seated and screw the nozzle cap to tighten and lock in place before installing into the gun.
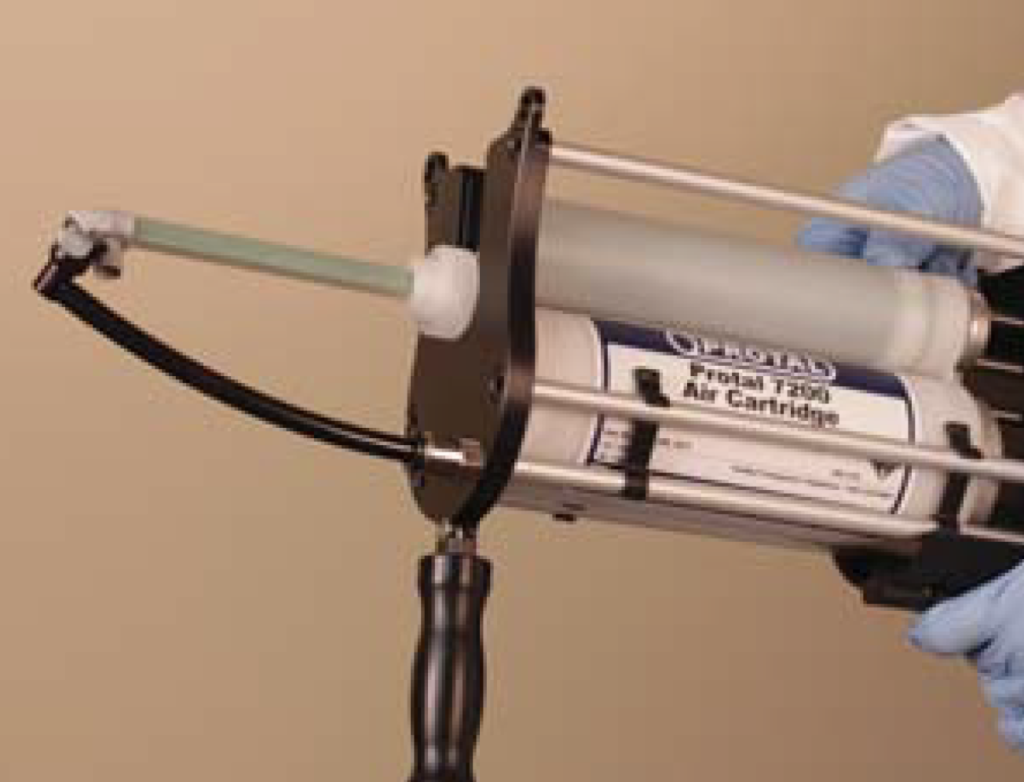
Insert Cartridge & Attach Air Hose
Hold the air cartridge gun in an upright position, away from yourself and others, before installing the cartridge. Insert the cartridge, making sure it fits securely by snapping it into place. Connect the “quick lock adapter” on the air hose firmly onto the static mixing tip.
Purge Cartridge
Purge cartridge and mixing tip by first pulling the trigger half-way, just long enough to fill the static mixing tip with material. Continue purging away from the substrate by pulling tripper back completely. Purge for a few seconds until one uniform color is achieved.
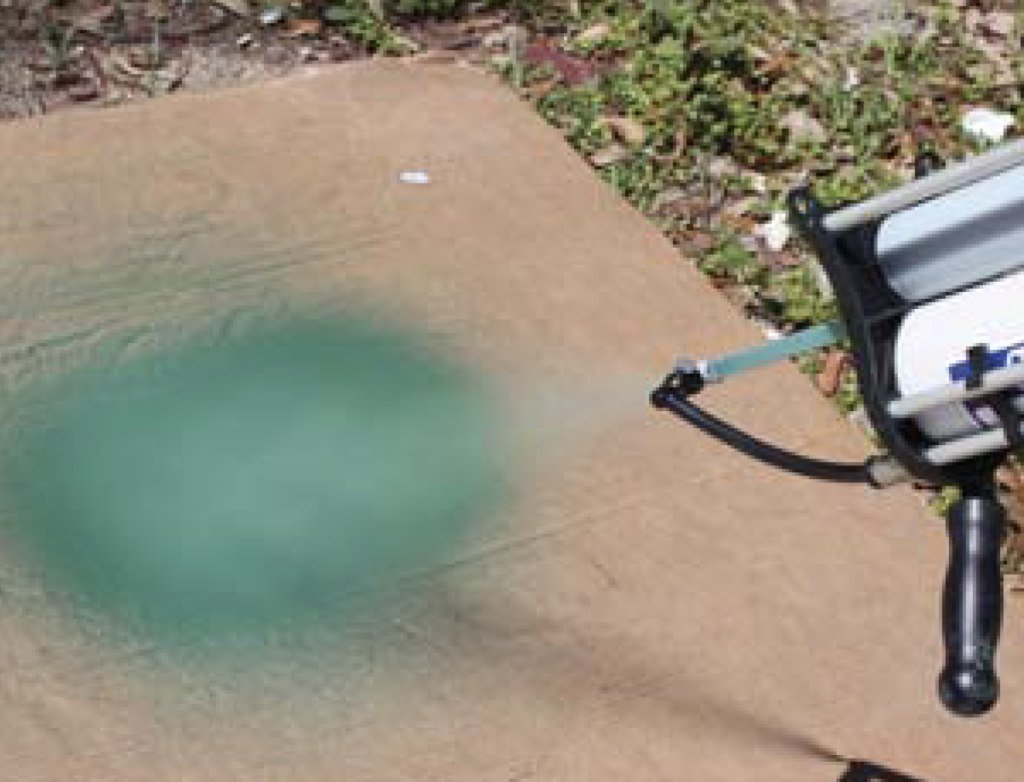
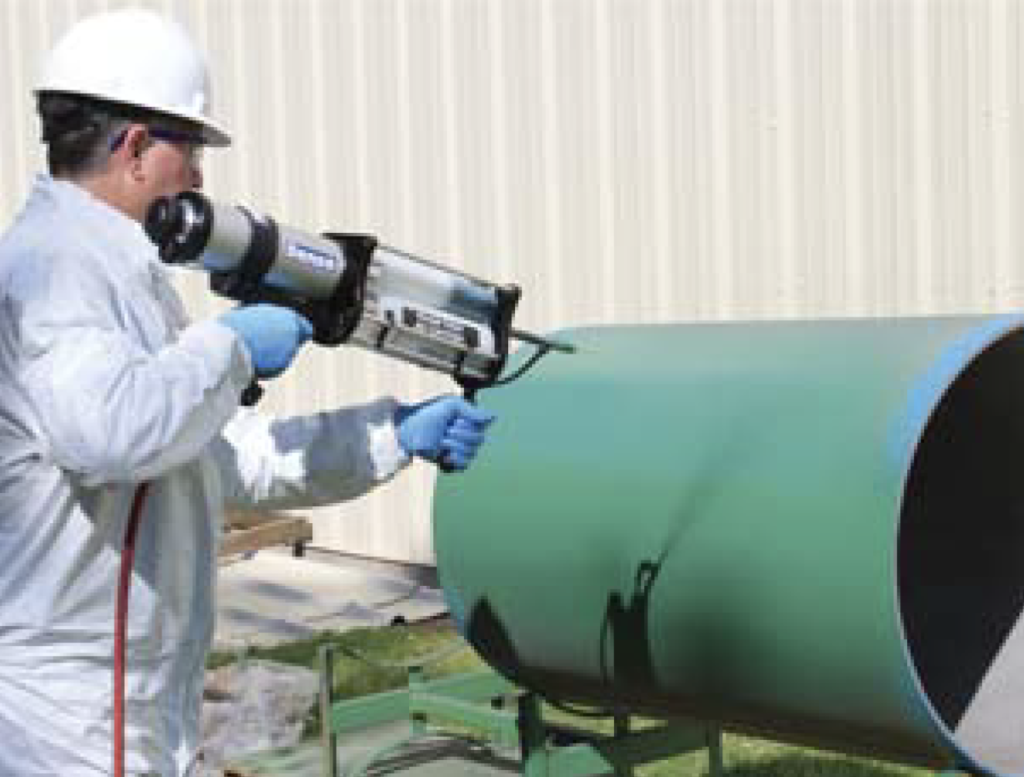
Spray Cartridge
Without stopping, begin spray application. Prior to stopping, move away from the substrate and then release the trigger. Any time the spray application is stopped, the cartridge shall be purged prior to beginning the next application. It is recommended to stop spraying with approximately 1/2″ material in the cartridge to eliminate potentially unmixed product.
Remove Cartridge From Gun
Press the red button to retract the ejector plates from the cartridge. Disconnect quick lock coupling on air hose from mixing tip air inlet. Partially-used cartridges may be reused by removing and discarding the mixing tip, wipe clean and resealing the cartridge with the original plug and nut assembly. Be sure to re-align the plug according to the A and B compounds. Refer to the Protal 7200 SDS and applicable regulations or authorities for waste disposal.